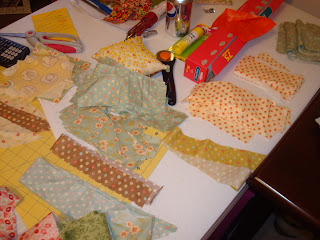
This is my favorite part of making a quilt. It means that the project is almost finished! When I first started binding, it was VERY intimidating, but after a couple tries I think I have it down pretty good, and you will too!
I almost always use a cross-grain binding, unless I have a curved quilt, in which case I use bias binding. That is a tutorial for a different day. Today we'll be doing cross-grain. Cross-grain binding is cutting the fabric perpendicular to the selvage. It has a little more stretch than length-wise binding (cutting the fabric parallel to the selvage making the strips very stiff), so it's more durable, but not as stretchy as bias binding, so it's easier to work with. Plus, this method is very cost-effective, and so easy.
Materials needed:
Rotary cutter and mat
Fabric
Sewing machine
Walking foot
Hand-quilting thread and needle
Binding clips (they look like those hair clips that snap on), or pins
Scissors
First, I cut the excess batting and backing from the quilt. You can either discard the scraps, or save them. I discard the scrap batting and keep the fabric scraps.
Next, you will want to cut your strips approx. 2.25"-2.5", perpendicular to the selvage.. I tend to cut mine 2.25" because I use cotton batting that has a low loft (it's thinner), but if you use a high loft batting, you will need to cut your strips to 2.5" to account for the bulk. Remember to cut your selvage after you cut your strips!
To calculate how many strips you will need, there is some math involved (ew). I hate math too, but it's a necessary evil.
You will want to measure all four sides of your quilt and add them together plus 12. So for example, my quilt is 51.5"x56". So your math should look like this - 51.5 + 51.5 +56 + 56 + 12 = 227.
227 is the amount of inches of binding I will need.
Now, divide this number by 40 (an approx. measurement of the width of your fabric, as most cottons are 40" wide). So, 227/40= 5.675.
This number is the amount of strips I need, which you should always round UP to the next whole number. So for my quilt, I will need 6 strips of 2.25"x40" fabric.
It's okay if your fabric is a little wider than 40 inches, as this will just be overlap.
Now that you have your strips cut out, I will sew them together into one long strip of fabric.
Line up the two ends of 2 strips of fabric, at a 90 degree angle, pretty sides together, like the picture.
Next, fold the corner of the top piece down on itself, like the picture, and press with a hot iron (no steam).
When you fold the corner back, you will see a line from the iron. This will be the seam guide when you sew the two pieces together.
Pin the two pieces together
And sew along the seam guide. Be sure to back-stitch at the beginning and end of your seam to ensure the stitches lock. I use my walking foot for the entire tutorial, and it's a good idea so your fabric feeds evenly.
Cut the excess, on the right, to about 1/4". You don't need to be exact, as it will be pressed.
Press the seam to one side with a hot iron (no steam).
And now you've attached two pieces of your binding together! Continue to do this to the rest of the strips, using the same method, making one long strip of fabric.
Once your strips are attached together, iron your strip in half, length-wise, making sure the strip has the pretty side facing out.
Now, you are ready to attach the binding!
Begin by placing the start of the strip about 10 inches from the top of the front of the quilt. You will then start sewing approx 10 inches from the start of the binding strip. (hint - if you don't want to worry about getting stuck with pins, use binding clips. They look like hair clips, and you can clip the binding to your quilt quite easily). Using a walking foot, continue sewing until you get approx 1/4" from the next corner.
When you get 1/4" from the first corner, turn the quilt 90 degrees and back-stitch, and front-stitch to lock your seams. Cut your threads.
Flip your binding strip straight up, and bring it down again, making a square (this is what makes the mitered border...well, mtered). Start stitching again approx. 1/4" from the top of this side.
It should look like this when you've sewn it (this picture was taken after I had attached the entire binding and after I had cut the corners. DO NOT cut the corners until you've attached the entire length of the binding).
Continue attaching the binding, using the same method, along the perimeter of your quilt, until you get approx 8 inches from where the binding strip begins, NOT where you started sewing.
When you get approx. 8 inches from the beginning of the binding strip, back stitch and cut your threads. You will now have two long (ish) flaps of binding, overlapping quite a bit. Cut the end of your binding so that it overlaps by about 1/2" over the beginning of your binding.
Open your binding and sew, right sides together, using a 1/4" seam.
Now, your binding is attached, end to end.
You will now finish attaching your binding to the quilt, laying the unsewn strip flat against the quilt. Starting where you left off, back-stitching and continuing on until you get to where you started sewing, and back stitch again.
And now your binding is attached!
Hand stitching the binding.
This is not as intimidating as you might think! Just pop in a movie and your done in no time.
At this point, your binding is attached to the front of the quilt. Snip each corner off, being careful not to cut any stitches that hold the binding to the quilt.
Take your quilting thread, thread the needle, and tie a knot. Pull the knot through the binding seam. The white dot just under the binding stitches is the knot. I don't recommend using thread more than 18" long. Much longer than that, and your thread will knot as you pull it through the fabric.
Flip your binding over, and clip it to the back of the quilt using those binding clips we used earlier. At the corners, you will want to turn the binding so it goes over the corners as neatly as possible.
Start sewing. Take your needle through the backing fabric, and up into the binding. Repeat this until you get to the first corner. I recommend starting in the middle of a side. It's much easier than to have to miter a corner first thing
Once you get to a corner, fold the flaps as neatly as you can and tack a few stitches to hold it together.
Continue to do this through the length of your quilt, and your binding is done!!
Tip - When you have to tie a knot when you run out of thread, I tie it underneath the binding, so as to not create a yucky mess on the outside.
I am not, by any means, a professional quilt binder. I don't put my quilts in shows, they are meant to be curled up on the couch, snuggled underneath when sick, and a comfort to those who need it.
If you have any questions or comments, just send me a message, email, or leave a comment in the comments section!!


