Welcome!

Welcome to my blog! Add me as a friend on Facebook! You can also folow me on Twitter. If you have any questions on quilting, I can try to answer them for you, or you can check out my FAQ, or email me at skippitydodahquilts@yahoo.com

Happy Quilting!

About Me

My photo
I'm just a new wife who has an obsession with my sewing machine! In Oct. 2010, my mother and I created my first sewing project - Euro pillow shams. I was hooked! I read everything I could get my hands on that had to do with sewing! Books, magazines, online tutorials. I experimented and found that I get so much enjoyment from making quilts, and that it's where I found my niche. I'm still a beginner, but I've learned so much in just 5 short months, that I want to share it with someone!

Tuesday, July 12, 2011

Quilt-along block #6 - postponed

Hey, everyone! 

I am so sorry to spring this on everyone, but the Quilt-Along block #6 will have to be postponed until Friday, due to some unexpected complications that don't allow me to be near my machine.

I am so sorry! Better planning on my part and assembling the block and taking pictures sooner could have prevented this mess, but it just didn't work out that way. 

In the meantime, if you have any questions regarding any of the blocks we've done so far, just email me at skippitydodahquilts@yahoo.com

I try to respond to all emails within 24 hours or less. 

I hope everyone understands that sometimes we just don't plan for the unexpected.

Much love!

Monday, July 11, 2011

Ohio One Stop Shop Hop

Over the weekend I had the opportunity to attend the Ohio One Stop Shop Hop in the Dayton, Ohio area as a guest with the owner of our LQS! 
I went with one of the owners of our LQS, and we had so much fun

There were 27 shops total, but pictures weren't allowed at many of the booths, so I only took pictures of ours.

This one stop shop hop was the first our LQS had ever participated in, and I think it was an amazing learning experience for everyone. As a quilter, I learned so many new tricks for quilting. As a vender, the shop owner learned some valuable tools for the next shop hop!
It was probably the longest two days of the year, so far, but it was the most fun I've had this year too!

I hope everyone had a fantastic weekend, and don't forget to stay tuned for the quilt-along block tomorrow!

Thursday, July 7, 2011

Green Fairy Quilts

When I first started blogging, the second blog I followed was Judi 'The Green Fairy'

If you aren't familiar with her story, she is an amazing quilter and pattern designer. Her designs are so original and fresh and fun, and her quilting is absolutely insanely good! 

She and her husband own their own (and very successful, I might add!) online fabric shop. They specialize in pre-cut fabric (my favorite kind of fabric!) and they have a great selection. You can even pre-order all the new stuff, so you know that you're getting it before it sells out everywhere else!

Along with her professional longarming and online store, Judi and her husband Clint have a non-profit organization
Basically, Clint lived in Romania for 2 years for a mission and was so moved that he started the organization. This will be their 4th year going to Romania to give quilts to children at a local orphanage. Along with quilts, the couple gives school supplies and food to the orphanage, which doubles as a soup kitchen for the homeless children in the neighborhood. 
I was really moved when I saw the videos of their past trips. They're gearing up for their September 2011 trip, and are always taking donations (monetary and quilts).

When I watched the videos, I knew there was something I had to do. So, this is my donation to Judi and Clint. Although small, I feel that if this quilt can keep a child warm, I've done my job.


Specs:
Bleached muslin, 200 thread ct. 
Quilting - I did an all-over medium-size stipple on a Gammill Vision that I rent by the hour. It took me about 45 minutes to quilt. 
Thread - Piecing and quilting thread are both from Connecting Threads.


To read more about Judi, her quilting, her shop, and her organization, click here.

Tuesday, July 5, 2011

Quilt-Along Block #5

Whew! It's been a looonng time since I posted! Here in the states, it was Independence Day on the 4th, so we had celebrations all weekend. It was fun, but I'm glad to get back into a normal routine!

An update on the house-hunting - 

We looked at a house last week, we really liked it. A part of me was (and still is) a little bitter about the other house, and I wasn't ready for another experience like that one! It turns out that the house is in short sale at a much lower price than the value and at what the other homes in the area are worth. We made an offer, and are now at the mercy of the bank, who can either accept, counter, or reject our offer. Hopefully it swings in our favor!

Okay, so we're into week 5 of the quilt-along! If you feel like you've been challenged the past few weeks, then I've done my job! These blocks are supposed to challenge new quilters to try new techniques and I want everyone to push themselves. 
So, for this block you will need the following - 

1 blue print square, 4 1/2"

4 pink print squares, 3 7/8"

4 tan/yellow squares, 4 7/8"

4 blue/blue print rectangles, 2 1/2"x7 1/4"

2 1/2" borders. 2 strips WOF (width of fabric) should suffice

1 ruler, at least 8" square, with a 45 degree angle mark


With your ruler, line up the 45 degree marks with the edge of your rectangle. Cut along the edge. You should now have a parallelogram that looks like this -
Repeat for the rest of the rectangles. 

Now, cut your tan/yellow squares and your pink squares in half, diagonally. You should have 8 triangles of each print. 


Now, take 2 pink squares and sew them to a rectangle like this, starting with the right triangle, and then sew the top triangle - 
note - you will have to trim corners as needed

Take two tan/yellow squares and sew together like this - 
Repeat until you have four total.

Assemble your block, using the partial seam method. If you've never done a partial seam, refer to this website. It gives very clear instructions using precise diagrams. 

Once you've assembled the pieces, you will need to trim any excess on the sides to square up the block.

Add your 2 1/2" borders

And you're finished! 
I really like this one. It gave me an opportunity to use some fun techniques that aren't normally used in traditional beginner piecing.

My local LQS has given me an awesome opportunity to attend the One Stop Shop Hop and help with the booth this weekend! It's Friday 9 AM-5 PM and Saturday 8 AM-3 PM at the Hope Hotel and Conference Center in Dayton, Ohio. I hope to see everyone there! We will be at the Heavenly Stitches booth, so make sure to come visit!


Thursday, June 30, 2011

Color Wheel - Slacking!

Okay, so some of your remember when I started on this color wheel.

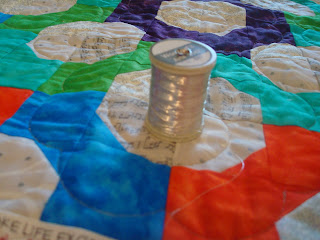
The quilting is almost done. I have to pick out a little bit at the top. I wasn't sure what I was going to do with it, so I experimented a little bit, and I'm learning the hard way that this particular thread is a little diva and doesn't like coming out of a quilt!

I decided on swirls in the middle of the bow-ties and a flower motif around the bow-ties. 

I used a metallic thread by Wonderfil.
It comes in tubes of four different colors, and Wonderfil has different color-ways to choose from.
I'm not sure if it's polyester, rayon, or a blend, but it was wayyy fussy on the machine. I suppose that's because it's wrapped with the metallic stuff that makes it shiny. Oh well. It still turned out really nice :)

At this point, I'm not rushing myself into finishing it. We won't be moving for several weeks, but I do need to get it done for my new (and hopefully improved!) sewing room =D. 

Speaking of moving. The house we looked at that we really liked is a no-go. The seller decided to take it off the market, and wasn't very gracious or nice about the whole situation, especially when she was told she had a prospective buyer.

Oh well. There is another house we are looking at tomorrow morning, so the search continues!

Anyway, that's the progress I've had on that project.

Tuesday, June 28, 2011

Quilt-along Block #4

Okay, so over the weekend, we got a buyer for our home! We went back and forth a couple times, but we settled on a number that everyone was happy with! Now I'm homeless! :)

I'm sure we'll find something shortly. We've looked at several places, and I really liked the last one we looked at, but we're having problems with the seller. So, now it's just a waiting game to see what the seller wants to do.

Okay, so let's get down to business! We're going into week four of the quilt-along! I hope everyone is coming along nicely. Don't forget that if you get stuck, have any questions, etc. just shoot me an email. I always respond within 24 hours, and most days it's much less than that.

So, for this tutorial you will need the following -

In a background print -
2 squares, 2 7/8" each


12 squares, 2 1/2" each


8 rectangles, 2 1/2"x4 1/2" each


In a plaid print -
2 squares, 2 7/8" each


4 rectangles, 2 1/2"x4 1/2" each


For the main two colors,  from each - 
4 squares, 2 1/2" each


2 squares, 2 7/8" each


Using your 2 7/8" background squares and your pink plaid 2 7/8" squares, make four half-square-triangles.


With your two main color (mine being the pink dot and the blue dot) 2 7/8" squares, make four more half-square-triangles.


Now, take your plaid rectangles and your 2 1/2" background squares and make four flying geese units.


To make these units, I sew each square on separately. Meaning, I sew on one square, trim and flip it, then repeat for the other side.

With your background rectangles and your main color 2 1/2" squares, make four more flying geese units, using the same method.


For assembly of the block, you will take your main-color HST's (half-square-triangles) and make a pinwheel. This will be the center of your block.


Arrange the units of your block like this -

Sew together.

Add your 2 1/2" border.

And you're done! I really like this one :). Probably one of my favorites, so far!

Hopefully, we will have some good news in the house-hunting department, later this week!

Sunday, June 26, 2011

The Lazy Angle Ruler - A review

Okay, so one of the things I got for my birthday was the Lazy Angle Ruler, with the gift certificate hubby got me.

I had been scoping out this ruler for a few weeks. I wasn't sure how to use it, or weather it was too advanced for me. Well, upon further inspection I decided to get the ruler. 

I also borrowed this book from one of the shop owners.
Lazy and Lovin' It

If you plan on getting the ruler, the book is a must-have. It shows you how to use it, different blocks and how to assemble them, and it's just a great addition to your library!


So, the ruler is relatively easy to use. I say that only because I had the book to constantly refer back to!

I'm a newbie. I've been quilting for 6 months, and once I read the directions on cutting and assembly, the block went together like a summer breeze :).


All that being said, I love the ruler, I love the book, and I'm purchasing my own copy of Lazy and Lovin' it :). I hope you found this review helpful. Don't forget, if you have any questions regarding any of my reviews, tutorials, or if you're a newbie like me and need some tips and tricks I've learned along the way, just shoot me an email ;). 

Saturday, June 25, 2011

Summer

So, I thought I wouldn't loose any momentum when the summer months started. 

But, as the hot, sunny days come and go, I have found that there is simply too much to do around here!

For instance - 

We got an offer on our home and now it's under contract! That means we're going to have to start seriously looking for a new place. 

We'll also have to start packing soon, so the house will end up being in chaos. But that's nothing new ;-). 

Gardens need tending to, dogs need walking, mini vacations must be thrown in there somewhere, and just some good, quality time with my family is in order.

That being said, I'm sorry for not writing as much! I did get a few things done, and I reeeally want to show you, but there really is not enough daylight! 

That's how the summer is going to be, I think. Posts will be sporadic, unannounced, and unplanned.

One thing that won't change - The summer quilt-along that's going on right now! I'll continue posting the new block every Tuesday. 

In the meantime, watch for a review of the Lazy Angle ruler (a birthday present) and what I made with it! 

I'm hoping that will be up tomorrow...But then again, it's summer :).

Tuesday, June 21, 2011

Quilt Along, Block #3

Hey, all! Thank you so much for the warm wishes for our anniversary! We had a lovely dinner out, but now I'm ready to show you block #3 of the Q.A.!

Disclaimer - I had to do the pictures for this tutorial in two different locations. I am sorry in advance for the differences in color value with the pictures. If you have any confusion, feel free to shoot me an email!
Okay, so for this block you will need the following - 

From a light color print:
1 square, 6 1/2"x6 1/2"

2 squares, 3 1/2"x3 1/2"

1 square, 3 7/8"x3 7/8"

2 rectangles, 3 1/2"x6 1/2"

From a pink print, the light color print, and a green print - each:

2 squares, 3 1/2"x3 1/2"

Edit - I only use two of these green squares. Sorry for the mix-up!


1 square, 3 7/8"x3 7/8" of each of the prints shown above. 

From another green print:
4 squares, 3 1/2"x3 1/2"

From a medium/dark print:
2 rectangles, 3 1/2"x 6 1/2"


Okay, so now that you have all of your pieces together, take your 3 1/2" pink and green squares and sew them down like this - 

Cut off the excess, press the seam back, and repeat for all four sides. This is what you should have - 

Now, you have four rectangles. Using the same method as posed above, sew down a 3 1/2" square. Cut off the excess, press the seam back, and repeat for the other side, only you will have squares on just the one side of the rectangle.

Now, take your 3 7/8" squares, and make some half square triangles. I use this method. You should have 4 half square triangles in all. 


Arrange your pieces to assemble your block.

Assemble the block, and add the borders.


And there you have it! 

I have to be honest with you guys, I don't know what I was thinking with these fabrics. I must have been smoking something really good when I pulled these out! (kidding!). But it has been a crazy weird day and my mind has just been all over the place. So I do apologize for a totally weird looking block ;-). I know you'll forgive me :-D.

Popular Posts